Now you can surprise and delight your internal stakeholders just like you do your customers. KeyShot’s latest Web Viewer update not only optimizes the user experience with an improved UI and faster load times, it also delivers powerful new features such as automatic configurations and KeyShot 360s.
Prep Your Scene for Publishing
To get started, you’ll need a scene that you are ready to publish to KeyShot Drive for viewing with the Web Viewer. If you plan on using the new KeyShot 360 feature, make sure you’ve created a KeyShotXR by using either the KeyShotXR Wizard located on the bottom tool bar or by outputting one through the Render window.
Once you’re ready to publish your scene, locate the Web Viewer button on the bottom toolbar and open the Web Viewer Upload window. For the most part, this window remains largely unchanged compared to the previous version, aside from the KeyShot 360 section where you can attach a .360 file generated while outputting a KeyShotXR.
If you are attaching an XR, this is where you would located your .360 file within the KeyShotXR folder created and either drag and drop the file into the designated field, or select it through the Browse files option. Note that attaching an XR is not a required step, so if you do not have an XR to attach, you can skip directly to uploading your scene when ready to do so.
Publish Your Scene
Once you’ve hit the Upload button and your scene has been baked and published to KeyShot Cloud, you can access a link to your scene through the Upload window upon completion as well as through the My Scenes tab of the KeyShot Cloud Library. You can access the My Scenes tab through the KeyShot Cloud Library button in KeyShot (to the lower left) or by logging into the Cloud Library (cloud.keyshot.com) through your web browser.
Once a link is shared, anyone with the link can now access your published Web Viewer scene. By following the link, the Web Viewer will open and you’ll be able to navigate your scene and attachments through the web based browser.
UI Updates
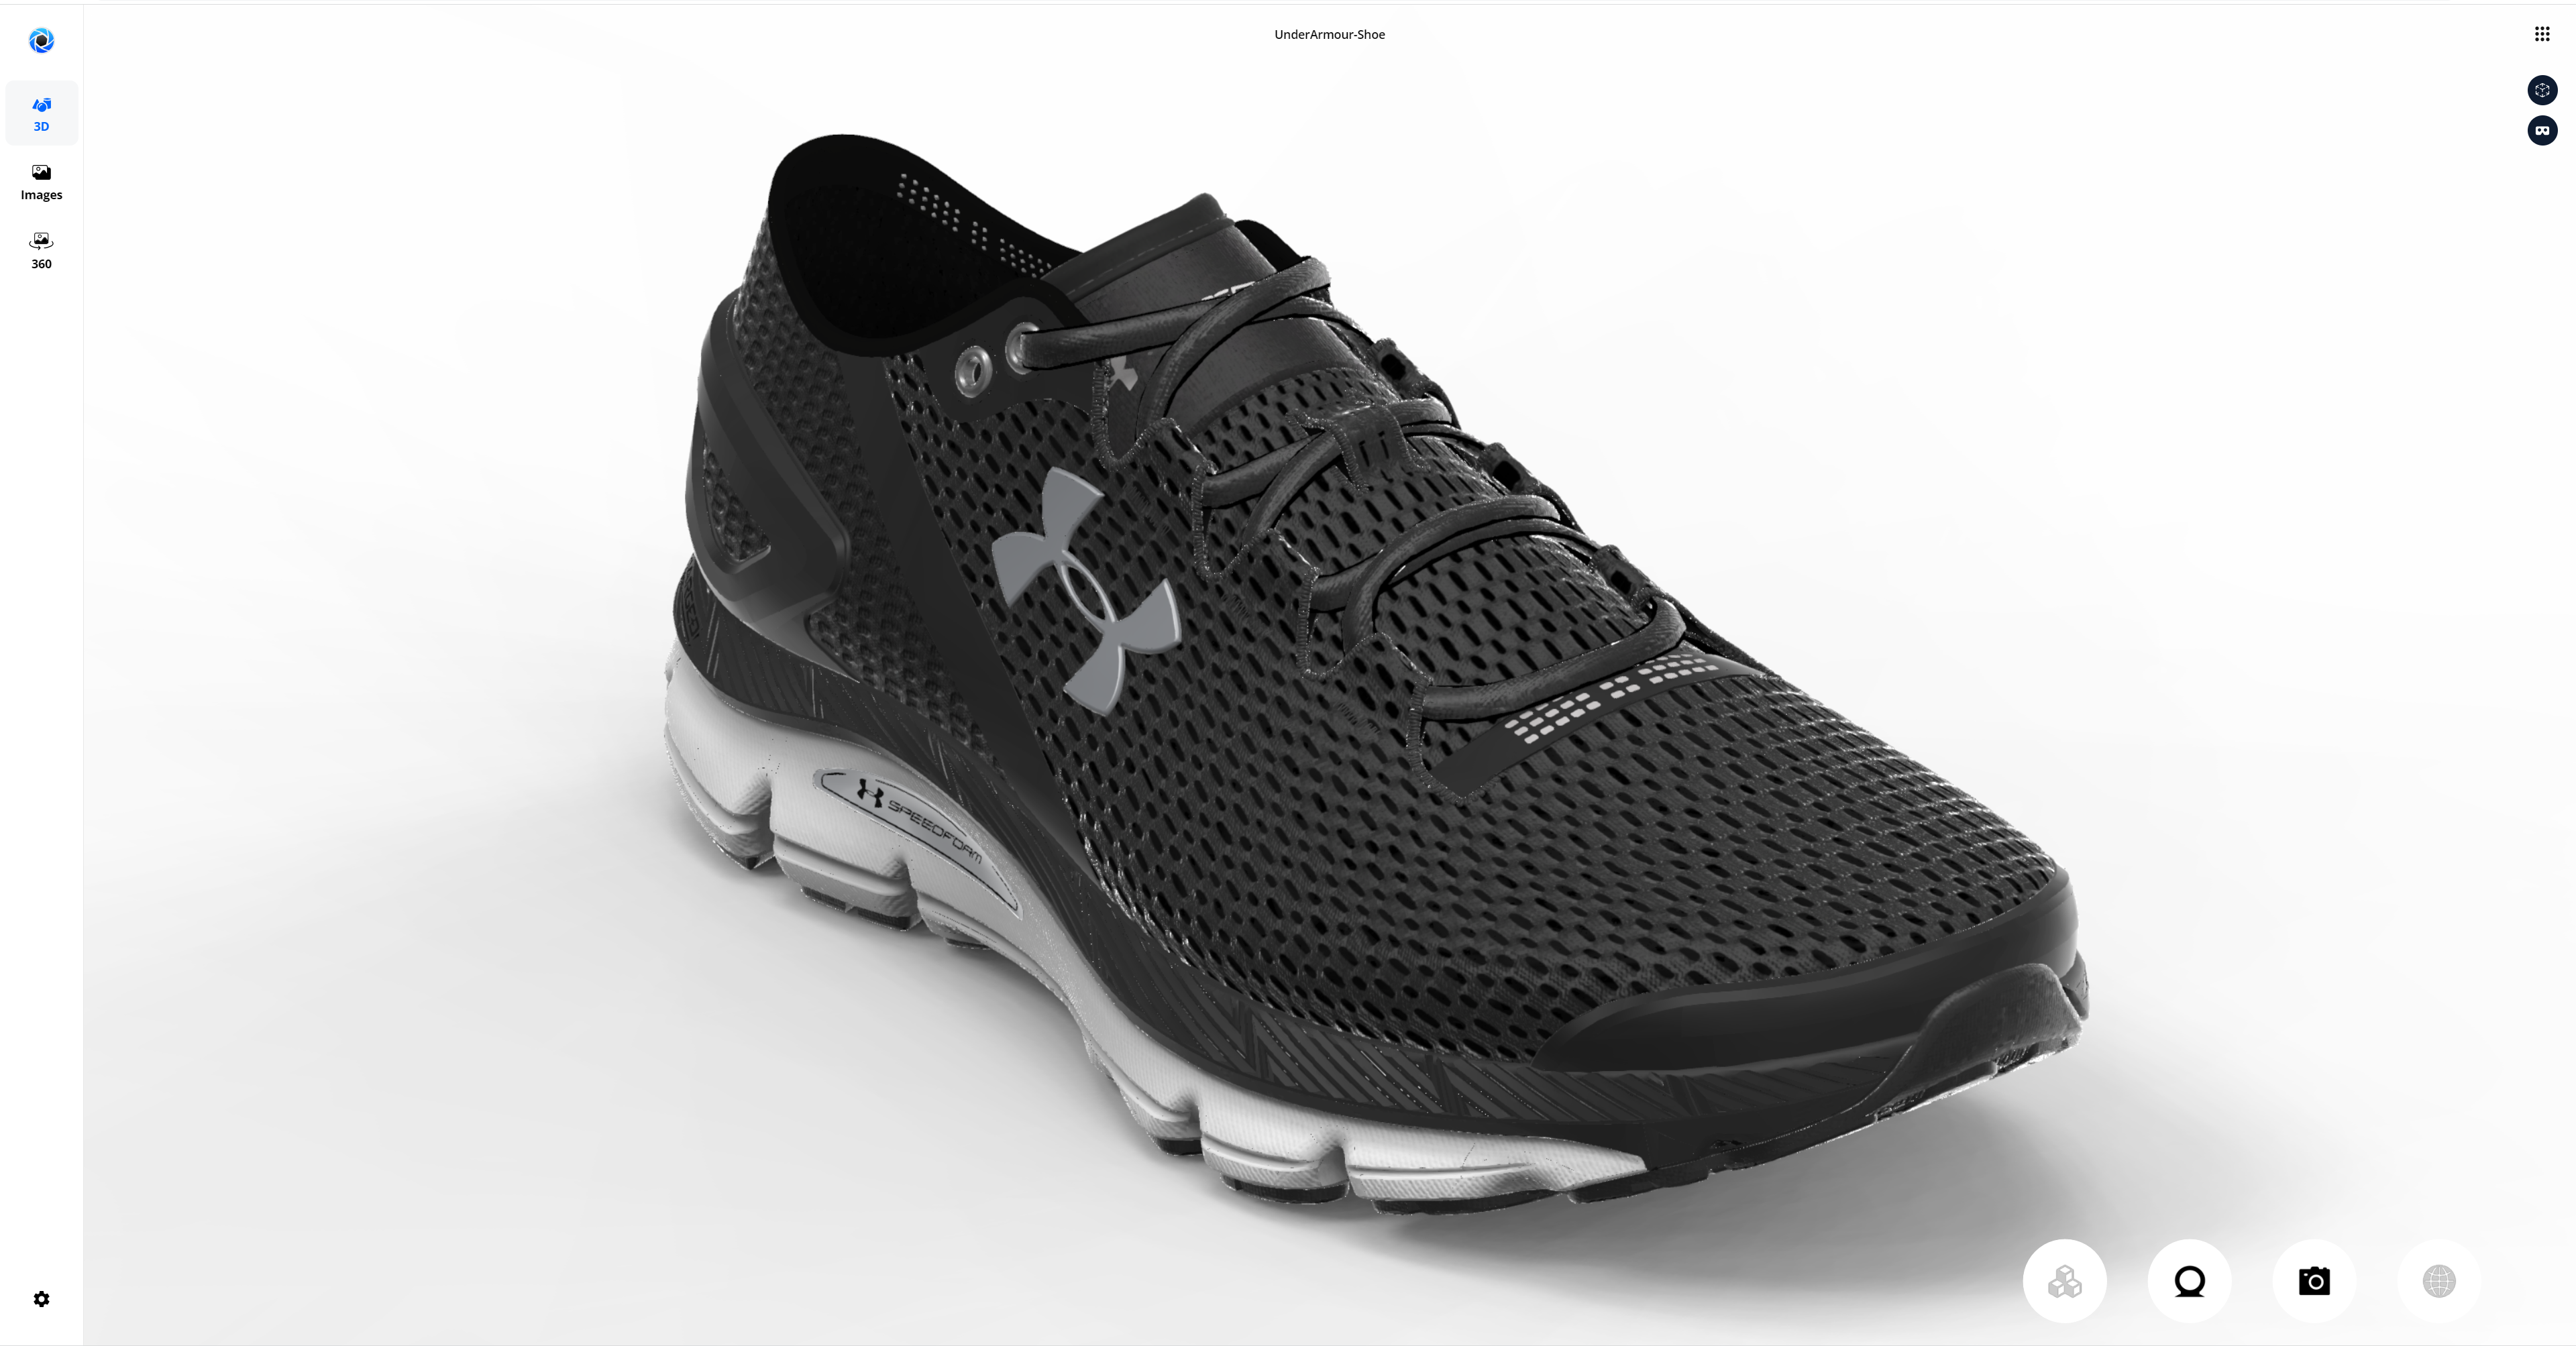
If you’re familiar with previous versions of the Web Viewer, you’ll notice that the overall UI has changed a bit. The most noticeable difference is the addition of a tab system along the left side of the Web Viewer. From here you can access the main Web Viewer viewport through the 3D tab, which should be the tab that first opens on loading. Just below that is the Images tab and at the last is the 360 tab.
You may also notice that the hamburger icon on the top left has been removed, and with it, so have the camera controls and performance test functionality in favor a more streamlined user experience.
However, you can still adjust the Web Viewer quality settings and take screenshots by clicking on the gear icon on the bottom left of the screen. Aside from that, the AR and VR buttons remain in the same location, and you can still cycle through your Components, Materials, Cameras, and Environments through the configurator buttons on the bottom right.
Images Tab
Once you move from the main view port, or 3D tab, to the Image tab, you’ll be able to access any supplementary images you’ve attached in the image section of the upload window.
You can navigate by using the thumbnail preview images just to the right of the tabs, or by cycling through the images with the arrows at the bottom center of the window.
Something important to note for this section is that any image files can be attached. This section does not need to strictly be a place where you can share renderings of your scene; you can also attach any other supplementary information such as sketches, CMF documentation, isometric images and so on.
360 Tab
The last tab on the left of the screen is the 360 tab. This is where you’ll find any KeyShotXRs that were attached to your published scene. Note that there is no limit to the amount of XRs that can be attached to a Web Viewer upload. However, be aware that larger uploads may cause longer upload times when viewing on less powerful devices.
Once the tab is selected, your KeyShot 360 will load and you’ll be able to interact with it by zooming in and out with the scroll wheel on your mouse and by clicking and dragging from either right to left or left to right to progress through the animation.
For those not aware of how a KeyShotXR works, XRs are essentially a series of still images that, when interacted with, create an almost stop motion-like animation, that can be sped up or slowed down based on how fast your scroll through the images, or in the case of a KeyShot 360, click and drag.
Now You’re Ready to Use the NEW KeyShot Web Viewer
With KeyShot Web Viewer’s latest updates, distributing scenes to global partners or even having conversations with internal stakeholders is easier than ever. The new streamlined interface and additional features ensure that the power of KeyShot is at your fingertips no matter where you are.
Let’s See What You Create!
We’d love to see what you create with this tip. Check out the new KeyShot Luminaries online community to see what others are creating and share your own work. And if you have a suggestion for another tip, share it in the comments below.


