Sometimes, positioning labels can be tricky. In some scenarios, your geometry is simple, making it easy to apply a label and carry on. But what if you need to accurately position a label on a tire wall, or the rim of any other cylindrical object, such as a camera lens? There is a specific process that makes placing such labels both easy and predictable. Let’s take a look at Planar Projection, how it works and how to use it to speed up your workflow.
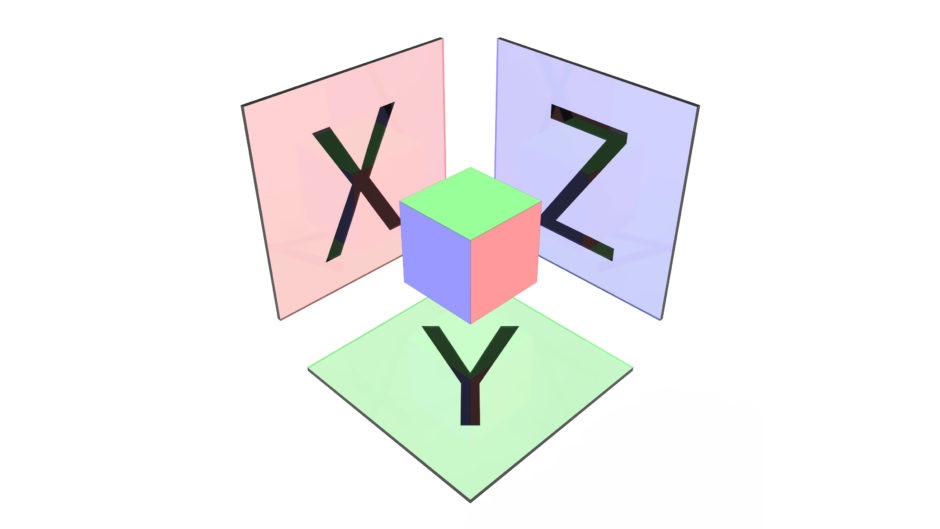
Planar Projection chooses one of the three planes X, Y or Z, and places your label (or texture) normal to that plane. Planar Projection will ignore camera position and the shape of geometry the label or texture is being applied to. Because it ignores these items, Planar Projection is very predictable.

The cube shows the faces that Planar Projection will use to position the label.
Preparing the label for Planar Projection is crucial to taking full advantage of its functionality. If you know the dimensions of the piece of geometry the label is being applied to, then the label can be prepared to match it in KeyShot.
How Planar Projection works in KeyShot
In KeyShot, Planar Projection scales and centers a label or texture to the extents on one surface of the geometry’s bounding box. For example, a cylinder’s bounding box will fit the length, width and height of the cylinder.

The planes show the extent of the bounding box for a cylinder.
How to take advantage of KeyShot’s Planar Projection
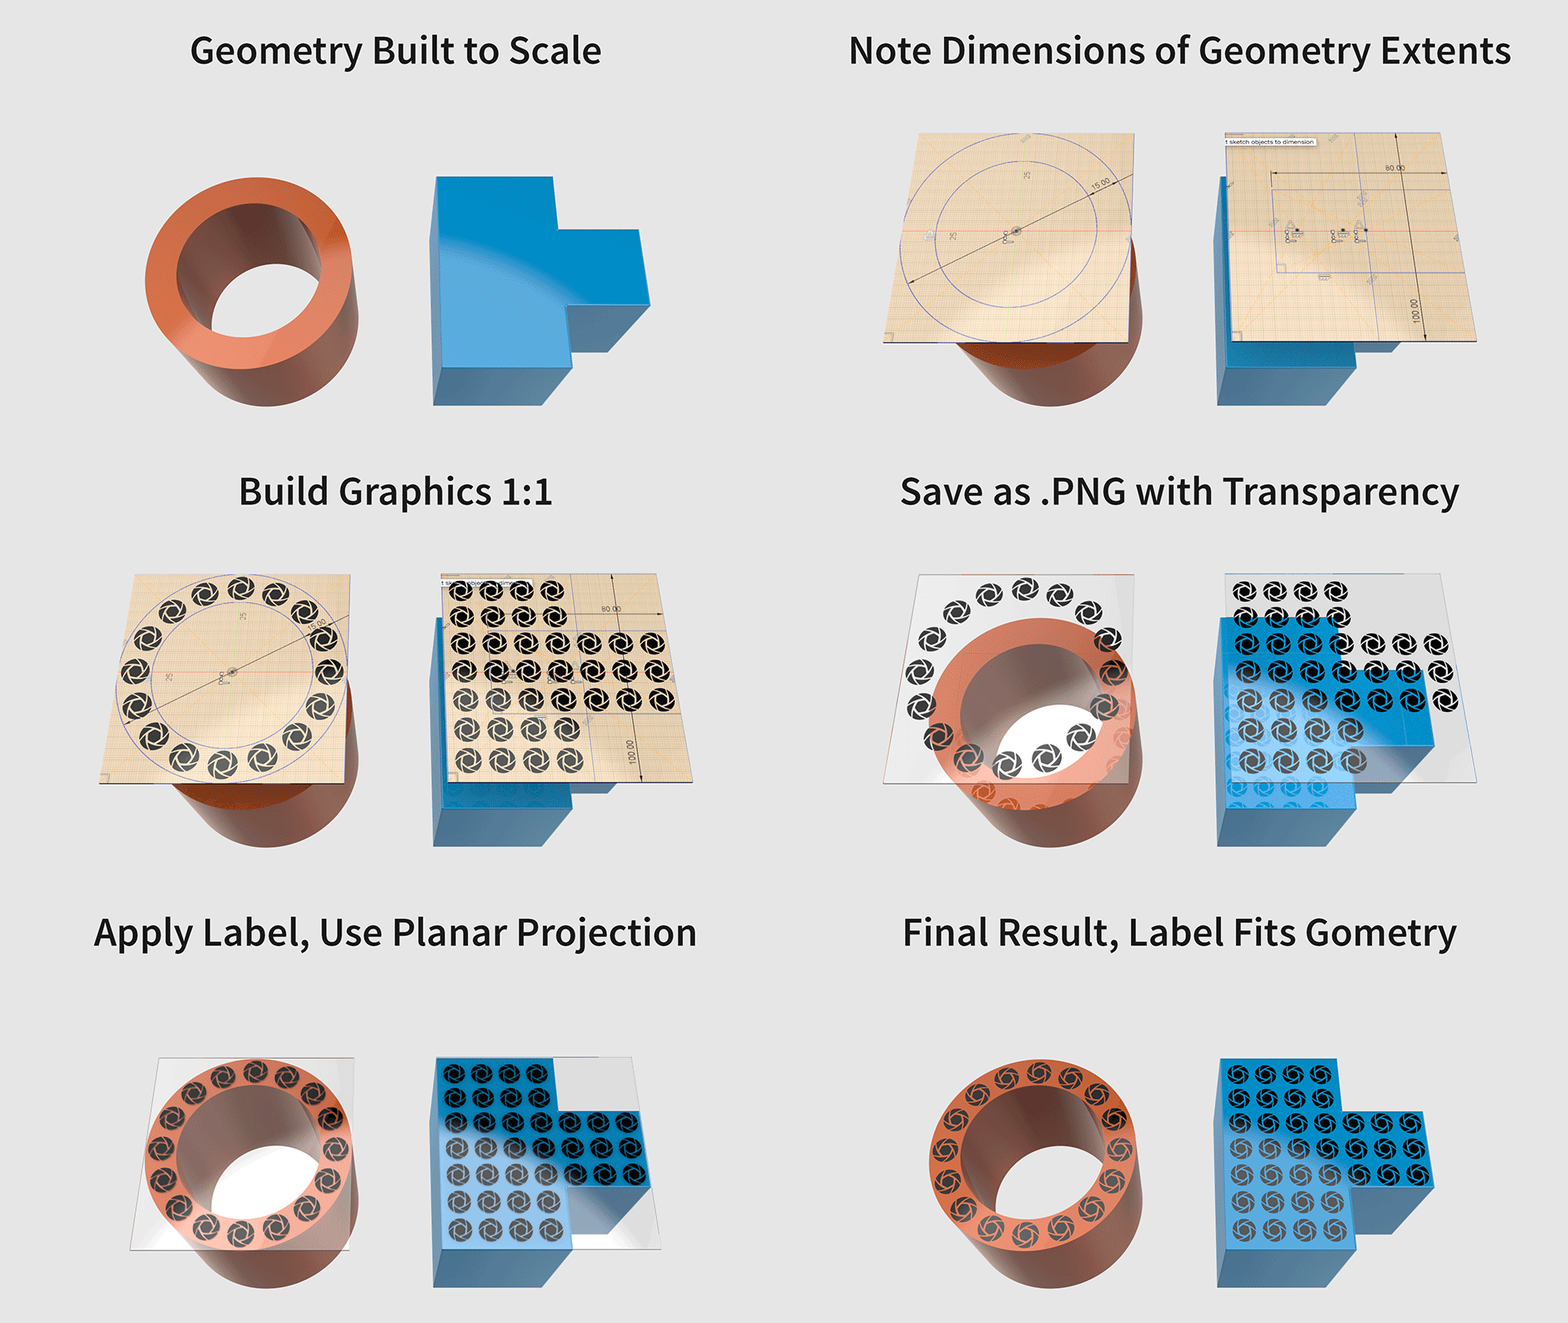
- Build your geometry to scale with real units.
- Note the dimension of the geometry extents.
- Create your label graphic to scale with real units
- Save as .png with transparency at your desired DPI.
- In KeyShot, apply the label choosing the Planar Projection type from the Projection Type drop-down menu.
- Check the DPI checkbox (under label properties) and enter the DPI you used for the graphic.
- Click Reset and make sure both X and Y scale values are set to 1.
Let’s take another look at these steps with an illustration. This animated .gif shows the steps taken to create graphics, then place them using Planar Projection in KeyShot.
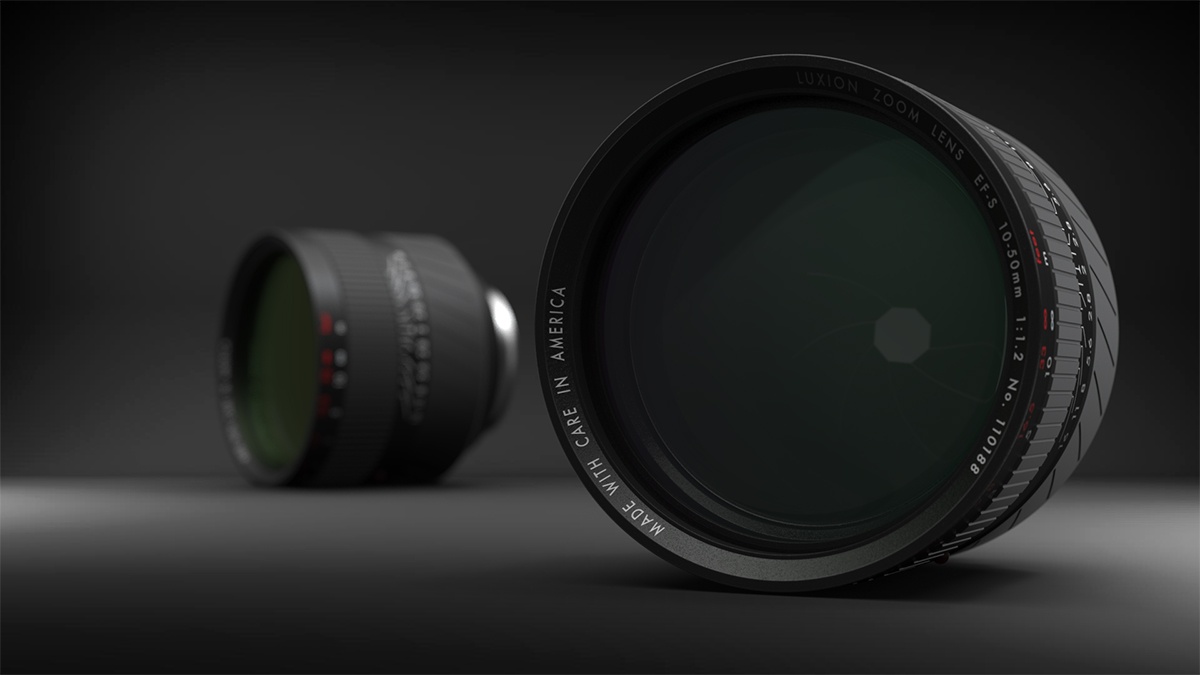
There are many ways in which this method for applying labels in KeyShot can be used, and it makes the process of applying labels faster and more accurate, while avoiding stretching or scaling labels that don’t match the units. As an example, the label seen on the end of the lens in the rendering below was created and applied in the same way as described above.
Hands-on KeyShot Training
Interested in learning more about KeyShot? Contact us for information on our training that covers everything from KeyShot Basics to Advanced Workflow, Material Creation and more.


