When working on scenes in KeyShot with complex lighting or materials, you may notice the Real-time Viewer can take longer to resolve. Real-time Region Render can help maintain a fast workflow by allowing to render specific regions of your scene in real-time.
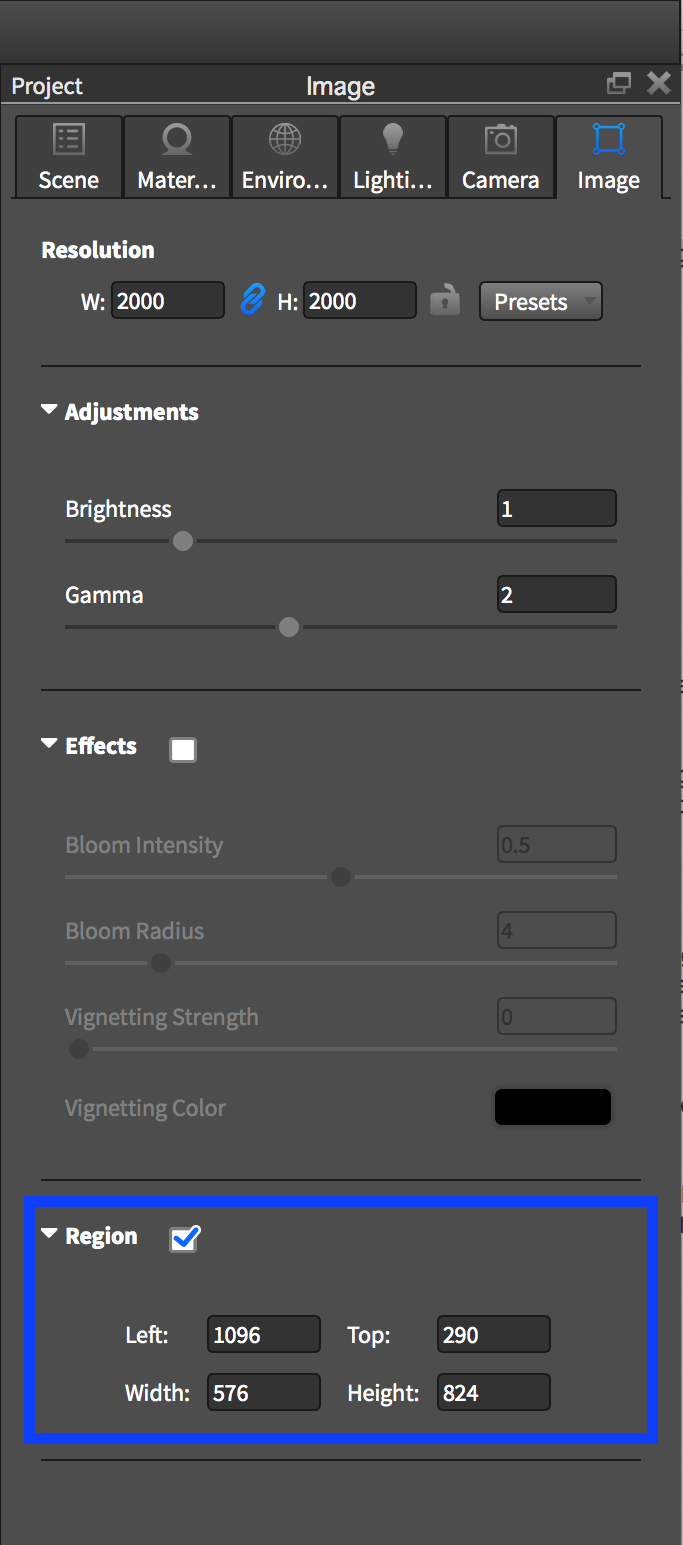
To initiate Real-time Region Rendering, select the Image tab, located in the Project window. At the bottom, click the Region checkbox as shown in the image below.

In the Real-time Viewer, drag the corners of the region render box to focus all of KeyShot’s render power on the area you’re want to resolve. The smaller the Real-time Region is, the faster the image will resolve, allowing you to maintain that speedy workflow. You can see a side-by-side comparison of a layered glass material with and without enabling Real-time Region Rendering below. In this example, the Region render image resolves 300% faster.

When it’s time to start your final render, be sure to uncheck the Region Render box if you want to render the extents of the Real-time Viewer.
KeyShot is known for being a tool that offers great results in very little time. Real-time Region Rendering is one of the many features that allows you to maximize your creative output and reduce the time it takes to produce that final shot.


