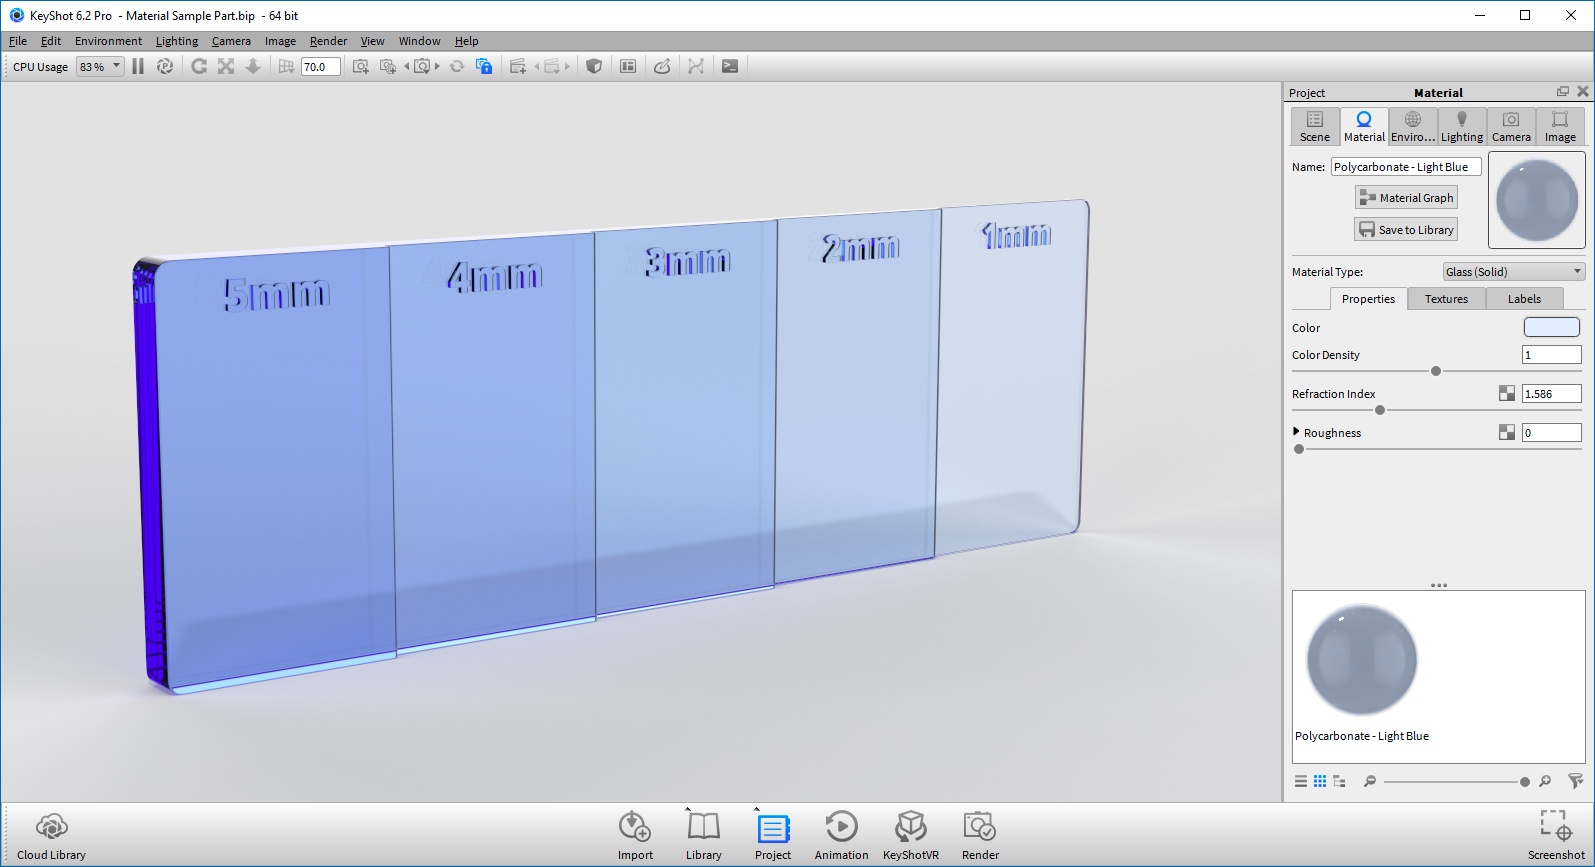
When we observe materials in real life, transparent materials like glass can vary in color depending on the thickness of that material. Window glass, for example, will show very little color in areas where the material is thin. However, when looking at the edge of the glass, much more color is visible due to the material thickness. Another example is a body of water–shallow water is more transparent, whereas deep water becomes very dark.
In KeyShot, the Glass (Solid), Dielectric, and Liquid materials use Color Density or Transparency to control the intensity of the material color. While the color is defined using a simple RGB or HSV value, the Color Density/Transparency slider defines how far light must travel through the material for the full color to be realized. This slider is based on your scene/model units, so accurate geometry is extremely important.
In the sample below, a color chip has been modeled in millimeters and the Glass (Solid) material was applied. When the Color Density slider is set to 1, we see 100% of the color when the wall thickness is 1mm. Walls thicker than 1mm are darker, and if the wall was thinner than 1mm we would see less color. This slider can be confusing because a greater value (more distance) will lead to a less saturated color. A larger value will quickly become very dark since the effect is dependent on your geometry’s volume.
It can also be helpful to avoid black color values, since the darkening effect is exponential. Also note, that the Color Density setting works best with solid volumes, not simple surfaces. Here’s the sample scene of the example above for you to download and examine yourself.
Hands-on KeyShot Training
Interested in learning more about KeyShot? Contact us for information on our training that covers everything from KeyShot Basics to Advanced Workflow, Material Creation and more.
Contact Us


